You walk into a trendy coffee shop or a boutique hotel, and you see them everywhere: heavy iron pipes twisted into strange shapes, glowing with the warm amber light of vintage bulbs. They look expensive. You check the price tag online—$200, $300, sometimes more.
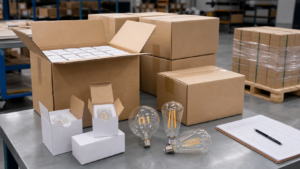
Industrial pipe lamps are essentially "adult LEGOs" made from standard plumbing components found at any local hardware store. By combining these modular threaded iron pieces with a simple wiring kit and a high-quality LED Edison bulb, you can build a custom, durable, and stylish lamp for a fraction of the retail price, with no specialized tools required (except maybe a screwdriver).

I have a customer named Jacky. He runs a steakhouse in Texas.
He wanted to put a small lamp on every table in his restaurant.
He looked at my catalog. He looked at designer lighting catalogs.
"Wallson," he said, "I need 50 lamps. But I only have a budget of $2000. That's $40 per lamp. Can you help me?"
I told him: "Jacky, don't buy the lamps. Buy my bulbs. Then go to the plumbing aisle."
Jacky is not an electrician. He is a restaurant owner.
But over one weekend, he and his son built 50 custom lamps in his garage.
They are heavy. They are tough. Customers love them.
Unlike fragile ceramic lamps that break when knocked over, pipe lamps are virtually indestructible.
And the best part?
They are the perfect housing for LED Edison bulbs.
The raw, cold, dark metal contrasts perfectly with the warm, soft, fragile look of the glass bulb.
It is a balance of "Hard" and "Soft."
If you have never built anything electrical before, this is where you start.
What Parts Do You Actually Need from the Plumbing Aisle?
You might feel intimidated walking into the plumbing section. There are thousands of pieces. But for lamp making, you only need to know five specific names.
The essential components for any pipe lamp are the Flange (the base), the Nipple (the straight connector), the Elbow (the 90-degree turn), the Tee (the 3-way split), and the Reducer (to fit the bulb socket). Stick to "Black Iron" or "Galvanized" steel in the ½-inch or ¾-inch size for the best aesthetic propotion.

Let's simplify your shopping list.
We are not building a water line. We don't need seals or Teflon tape.
We just need structure.
1. The Floor Flange:
This is a flat metal disk with four screw holes.
Plumbers use it to mount pipes to walls.
We use it as the Base of our lamp so it doesn't tip over.
2. The Nipple:
This is a funny name for a straight piece of pipe threaded on both ends.
They come in lengths from "Close" (1 inch) up to 12 inches or longer.
This determines the Height of your lamp.
3. The Elbow (90-degree):
This turns the corner.
It gives the lamp its "looking down" posture.
4. The Tee:
Shaped like a 'T'.
This allows you to branch out. Maybe you want a lamp with two bulbs? Or maybe you want a place to mount the switch?
5. The Reducer (The Secret Weapon):
Most pipes are too big for a light socket.
A standard bulb socket fits into a 1-inch hole smoothly, or can be glued into a reducer.
You often need a "1-inch to ½-inch" reducer coupling to hold the electrical part snugly.
Black vs. Galvanized:
"Black Iron" is dark, oily, and rustic. It looks vintage.
"Galvanized" is silver, zinc-coated, and shiny. It looks modern industrial.
Jacky chose Black Iron for his steakhouse. It hides dirt and looks like it has been there for 100 years.
The Cleaning Step:
Warning: Black iron pipes are covered in black grease.
This protects them from rust in the store.
Before you bring these into your living room, you must wash them.
Use a strong degreaser (like dish soap or orange cleaner) and hot water.
Dry them immediately, or they will rust in 10 minutes.
Spray them with a clear coat of matte polyurethane if you want them to stay clean forever.
Why Size Matters: ½ Inch vs ¾ Inch
I recommend using ½-inch1 or ¾-inch2 pipe.
Anything smaller (¼ inch) is too tight. Threading the electrical wire through it will be a nightmare.
Anything larger (1 inch) looks too bulky for a desk lamp, though it might work for a floor lamp.
¾-inch is my favorite. It feels substantial in your hand, like a serious piece of machinery.
How Do You Wire a Metal Lamp Without Shocking Yourself?
Wiring a pipe lamp is slightly different from wiring a wooden lamp because metal conducts electricity. If a wire scrapes against the rough inside of a pipe, the entire lamp becomes a live electrified object.
Safety in pipe lamps relies on protecting the wire insulation from sharp metal threads and ensuring the cord is not twisted to the breaking point during assembly. You must pre-thread the wire through the fully assembled pipe structure before attaching the socket, or use a "cord set" with the switch already on the cord to simplify the process.

Jacky called me during his build: "Wallson, the wire keeps getting stuck inside the elbow."
The inside of these pipes is rough. There might be burrs or sharp metal flakes.
The "Push-Through" Method:
Do not wire the socket first.
Assemble your pipes. Screw them all together tight except the final piece holding the socket.
Feed the wire from the bottom (the flange) all the way to the top.
If it gets stuck, tape the end of the wire to a piece of string or a flexible wire coat hanger to guide it through.
The "Twist" Problem:
I see this mistake constantly.
You connect the socket to the wires. Then you try to screw the socket into the pipe.
As you rotate the socket 10 times to tighten it, you are twisting the wire inside the pipe 10 times.
The wire coils up, stretches, and eventually snaps.
The Solution:
Before you screw the socket on, take the wire sticking out of the bottom of the lamp.
Twist it counter-clockwise (backwards) about 5 or 6 turns.
Now, as you screw the socket on (clockwise), the wire untwists and relaxes inside the pipe.
Protecting the Entry Point:
Where does the cord come out?
Usually, it comes out of a hole you drill in the base, or out of a "Tee" fitting.
That metal edge is sharp like a knife.
Over time, if you move the lamp, it will slice the cord.
You must use a plastic bushing or a rubber grommet.
Go to the electrical aisle. Buy a small rubber ring.
Glue it into the hole where the wire exits.
This rubber bumper saves lives.
Choosing the Right Socket
For pipe lamps, don't use the cheap plastic sockets. They look out of place.
Use a metal-shell socket3 (Brass, Nickel, or Black).
Or, use a Bakelite4 socket if you want that retro 1920s feel.
Ensure the socket is "Keyless" if your switch is on the cord.
Or, get a "Push-Bar" socket if you want to turn the lamp on at the bulb itself.
The "check ring" (the threaded ring on the socket) is how you mount it to the pipe reducer.
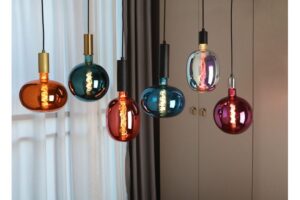
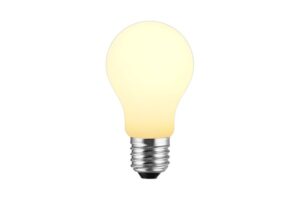
Which LED Edison Bulb Completes the Look?
You have built a tough, rugged, masculine metal robot. If you put a standard white frosted plastic bulb in it, you ruin the entire effect. The bulb is the "head" of this robot; it needs to have personality.
The filament design and glass shape are critical for pipe lamps because the bulb is completely exposed with no shade. A "Spiral" flexible filament offers a soft, organic contrast to the rigid pipes, while a gold-tinted (amber) glass finish smooths out the light, preventing glare from hitting the user's eyes directly.

Jacky asked me: "Wallson, which bulb do I order? The bright one?"
I said: "No. For a table lamp, brightness is not the goal. Atmosphere is the goal."
The Glare Factor:
Pipe lamps usually sit on a desk or a side table.
That means the bulb is right at eye level.
If you use a clear glass, 800-lumen bulb, you will blind your customers. It will hurt to look at.
You want low lumens (around 200-300 lumens).
You want amber glass. The gold tint blocks the harsh blue wavelengths.
The Shape Match:
- The Globe (G80/G125): This is the most popular. The round ball looks like a head on the pipe "neck." It is friendly and classic.
- The Tube (T45/T30): This looks like a continuation of the pipe. It is sleek and modern. It looks like a scientific instrument.
- The Pear (ST64): The standard vintage shape. It is a safe bet, but sometimes looks a bit small on a heavy ¾-inch pipe.
Hard vs. Soft:
Pipes are straight lines. Rigid. Unbending.
If you use a "straight wire" filament (the older LED style), it looks very stiff.
I recommend the Soft/Spiral Filament.
The filament curves and twists inside the bulb.
It looks like a glowing noodle or a DNA helix.
This organic curve softens the harsh look of the metal.
It makes the lamp feel like a living thing.
Adding a Dimmer Switch
Since these bulbs are exposed, sometimes even 300 lumens is too bright for a romantic dinner.
I strongly suggest adding an in-line dimmer switch5 to the power cord.
You can buy cords with the dimmer already attached.
Make sure the dimmer is rated for LEDs6.
Old incandescent dimmers (rheostat) make LEDs buzz.
A buzzing lamp on a quiet desk is very annoying.
My bulbs are dimmable, but only if the switch plays nice.
Related HongYu product pages
- LED Filament Bulb Product Range → — standard and decorative LED filament bulbs for wholesale and project sourcing.
- Contact HongYu Bulb → — send specifications, target market, quantity and packaging requirements for quotation.
Conclusion
Building an industrial pipe lamp is the perfect entry point into the world of DIY lighting. It requires no welding, no sawing, and no advanced engineering—just screwing parts together and basic wiring safety. The heavy, dark iron provides a timeless frame, but the LED Edison bulb provides the soul. By choosing a soft spiral filament and a warm amber tint, you transform a pile of plumbing parts into a high-end design piece that looks like it belongs in a luxury loft. Just remember: wash the grease off the pipes first, protect your wires from sharp edges, and never over-tighten your electrical connections.
Explore this link to understand why ½-inch pipes are preferred for lamp design, ensuring functionality and aesthetics. ↩
Discover the benefits of using ¾-inch pipes in desk lamps, balancing size and sturdiness for optimal design. ↩
Explore this link to understand why metal-shell sockets are preferred for durability and aesthetics in lamp design. ↩
Discover the unique properties of Bakelite and its vintage appeal in lamp sockets, enhancing your design choices. ↩
This resource will guide you through the installation process of a dimmer switch for LED lights, enhancing your lighting experience. ↩
Explore this link to find the best dimmer switches specifically designed for LED bulbs, ensuring optimal performance and no buzzing. ↩