You spent good money on a designer LED filament bulb. One day, it flickers and dies long before its promised 25,000-hour lifespan. You look at it, frustrated, wondering if you can crack it open and swap out a part, or if you just have to throw another piece of electronics into the landfill.
While technically possible for hobbyists, replacing components inside an LED Edison bulb is rarely practical or safe for the average consumer due to the gas-filled sealed glass chamber and high-voltage miniaturized electronics. However, understanding which parts fail allows you to troubleshoot the fixture, potentially saving the bulb if the fault lies externally in the socket or wiring.

I have a customer named Jacky, a "do-it-yourself" enthusiast from Ohio.
He hates waste. If his toaster breaks, he fixes it. If his car breaks, he fixes it.
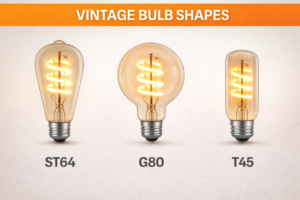
Last month, he emailed me a picture of my ST64 bulb. He had used a glass cutter to slice the top off.
"Wallson," he wrote. "I want to solder a new driver in here. Can you send me the spare chip?"
I had to tell him: "Jacky, put the soldering iron down. You are building a bomb."
The LED Edison bulb is not like an old 60W bulb where you just had a wire in a vacuum.
It is also not like a standard plastic LED bulb where you can pop the dome off.
These bulbs are filled with an inert gas (usually Helium or a mix) to cool the filaments.
Once you crack that glass seal to reach the components, the gas escapes.
Without the gas, even if you fix the part, the filaments will overheat and burn out in 3 minutes.
Repairing the internal parts is a manufacturing process, not a repair process.
However, sometimes the "failure" is not inside the glass.
Sometimes, it is repairable because the problem is actually the base contact or the environment.
Understanding the anatomy of failure helps you stop throwing away good bulbs.
Why Is the "Driver" the Most Common Point of Failure?
The filament strands (the glowing yellow parts) almost never burn out first. The weak link is always the hidden computer chip in the base.
The LED driver is the component that converts high-voltage AC electricity from your wall into low-voltage DC electricity for the bulb. Because it is crammed into a tiny, unventilated metal base, the electrolytic capacitors inside often dry out or overheat, causing the bulb to blink or die completely.

In my factory, we run lifetime tests.
We leave bulbs on for months.
When they finally die, we do an autopsy.
90% of the time, the yellow filaments are perfect. They look brand new.
But inside the metal screw cap, there is a tiny component called a Capacitor.
It looks like a miniature soda can.
Its job is to store energy and smooth out the flow of electricity.
Inside that can is a liquid (electrolyte).
Heat makes liquids evaporate.
Since the driver is trapped inside the base with no air flow, it gets hot.
The liquid dries up. The "can" swells or pops.
The driver loses its ability to regulate power.
The Symptoms:
- The Disco Strobe: The capacitor cannot hold a charge, so the light flashes on and off rapidly.
- The Delay: You flip the switch, and the light takes 3 seconds to turn on.
- The Dead Silence: The fuse component blows to protect the circuit, killing the bulb instantly.
Can You Replace It?
In a plastic bulb (A19 type), sometimes you can pry the plastic cap off and solder a new capacitor.
In an Edison Bulb, the driver is usually potted (glued) into the ceramic or plastic insulator ring of the base.
To get to it, you have to break the cement glue holding the glass.
As I told Jacky, once the glass seal breaks, the game is over.
The "repair" here is preventative.
You "fix" the driver by keeping it cool.
Do not put these bulbs in enclosed glass globes where heat cannot escape.
Give the driver air, and it will last 10 years. Suffocate it, and it lasts 1 year.
The "Solder Bump" Hack
There is one rare repair1 you can do.
Sometimes, cheap bulbs are made with a bad solder connection on the very bottom tip (the eyelet).
If you have a bulb that doesn't work, look at the bottom silver or brass bump.
Is it flat? Is it sunken?
Sometimes, simply adding a fresh drop of solder to this tip to build it up creates a better connection with the socket.
This is the only "internal" repair I recommend trying, because it is technically external.
How to Diagnose and Fix the Flattened Contact Tab?
You screw in a bulb. It doesn't work. You assume the bulb is broken and throw it away. But actually, the bulb was fine; it just wasn't touching the power source.
A common "failure" is actually a mechanical issue where the brass contact tab at the bottom of the light socket gets pushed down too far and loses contact with the bulb. By turning off the power and gently prying this tab upward with a small tool, you can "revive" a bulb that seemed dead.

This happens all the time to Jacky.
He calls me: "Wallson, this whole box of bulbs is duds."
I say: "Jacky, grab a different lamp. Test the bulbs there."
He calls back 10 minutes later: "Okay, they work in the other lamp. My socket is broken."
It is not broken; it is just tired.
The socket has a little springy metal tongue at the bottom. This is the Hot Contact.
Every time you screw a bulb in tight, you crush this tongue down.
Over years, the metal loses its springiness (metal fatigue).
It stays flat at the bottom.
My LED bulbs might have a slightly shorter base tip than the old bulb you removed.
So, when you screw mine in, it hovers 1 millimeter above the contact.
No touch = No light.
The Fix (The "Tab Lift"):
- Safety First: Go to your breaker panel. Flip the switch to OFF for that room. Putting a tool in a live socket will kill you.
- Verify power is off by testing with a working lamp or a voltage pen.
- Take a small flathead screwdriver or a needle-nose plier.
- Reach into the socket.
- Hook the tool under the brass tab at the bottom.
- Gently bend it upward about 20 or 30 degrees. Do not snap it off. Just give it a lift.
- Screw the bulb back in. Turn power on.
You will be amazed how many "dead" bulbs are fixed by this 30-second trick.
Cleaning Oxidation2
While you are in there, look for rust.
If the tab is green or black, it is oxidized.
Oxidation adds resistance. Resistance blocks the specific voltage my LED driver expects.
Scrape it clean with the tip of the screwdriver or a bit of sandpaper.
A shiny contact3 is a happy contact.
Can You Replace the "Filament" Strands Inside?
The yellow "noodle" inside the bulb is the light source. It looks like a simple wire, but it is actually a technological marvel. When people see a dark spot on the filament, they wonder if they can just swap that string out.
The LED filament is a fragile substrate of sapphire or ceramic coated in phosphor and micro-LED chips, sealed inside a gas-filled chamber. It is impossible to replace a single filament strand without specialized factory equipment to re-seal the glass and re-inject the cooling gas.

I want you to visualize what that yellow string is.
It is not a wire.
It is a stick of transparent ceramic (or sapphire in expensive models).
On that stick, we mount 20 to 30 microscopic blue LED chips.
We wire them together with gold thread thinner than a hair.
Then we dip the whole thing in yellow phosphor glue (which turns the blue light to white).
Why You Can't Touch It:
- Fragility: If you touch the yellow coating with tweezers, the oil from your hand ruins the phosphor. If you pinch it, the ceramic stick snaps.
- The Gas Seal: As I mentioned before, the bulb contains Helium gas to transfer heat from that ceramic stick to the outer glass wall.
If you cut the glass to change the filament, the gas leaves.
Even if you could solder a new strand in (which requires a microscope), you cannot refill the Helium and reseal the glass in your garage.
Without the gas, the new filament will cook itself in seconds.
Identifying a Dead Filament:
How do you know the filament is the problem?
Look closely at the yellow strips while the bulb is OFF.
Do you see a black dot? Or a break in the yellow line?
If you see a black burn mark on the yellow strip, the LED chip underneath has failed.
This bulb is dead.
It cannot be saved.
Recycle it.
The "Series4" Circuit Problem
In most Edison bulbs, the filaments are wired in Series.
This is like old Christmas tree lights.
If you have 4 long filaments, and electricity flows through 1 -> 2 -> 3 -> 4.
If filament breaks, the circuit is open. 1, 3, and 4 also go dark.
This is why the whole bulb dies at once.
In some industrial bulbs, we wire them in Parallel5.
If one breaks, the others stay on. The bulb looks dimmer, but it works.
But for 99% of home bulbs, one break means total failure.
When Is the Switch the Component That Needs Replacing?
Sometimes, you replace the bulb, and the new one flickers too. You replace it again. Same result. The definition of insanity is replacing the bulb when the switch is the culprit.
Older dimmer switches designed for incandescent loads often cause premature failure in LED bulbs by sending erratic voltage spikes. Replacing an incompatible "Leading Edge" dimmer with a modern "Trailing Edge" (ELV) smart switch is often the only repair that stops the cycle of destroying bulbs.

Jacky had a restaurant project where bulbs kept dying every 3 months.
"Your quality is dropping, Wallson," he complained.
I flew to his site to investigate.
They were using huge, old-fashioned rheostat dimmers from the 1990s.
These dimmers work by "chopping" the electricity waveform.
Old dimmers chop it violently (Leading Edge).
This sends a voltage spike to the bulb 120 times a second.
The LED driver tries to fight this spike. Eventually, it burns out.
The "Component" You Swap is the Switch:
I told Jacky: "Stop changing the bulbs. Change the switch."
We installed a Leviton ELV (Electronic Low Voltage) dimmer.
The problem stopped instantly.
The bulbs installed 2 years ago are still running today.
Signs the Switch is the Killer:
- Buzzing: If the bulb buzzes loudly, the switch is feeding it "dirty" power.
- Low Range Flickering: If the bulb is fine at 100% bright but freaks out at 40%, the dimmer is incompatible.
- Heat: If the dimmer switch on the wall feels hot to the touch, it is struggling.
Replacing a $20 switch can save you hundreds of dollars in "failed" bulbs over a few years.
The "Voltage Surge" Check
One final external check.
Does your home have frequent power surges?
LED drivers have a component called a MOV (Metal Oxide Varistor)6.
It protects against big surges (like lightning or grid switching).
It sacrifices itself. It takes the hit and dies to save the house from fire.
If you lose lots of electronics (bulbs, microwave clocks, TVs) at the same time, investigate your home's grounding or consider a whole-home surge protector7.
You cannot replace the MOV inside the bulb, but you can stop the surges from reaching it.
Conclusion
Let's be honest: LED Edison bulbs are "consumable" technology, not "repairable" heirlooms. The combination of sealed gas chambers and potted electronics means you cannot simply swap out a fried chip or a broken filament string. However, before you toss a dead bulb, inspect the external factors. Often, a "failed" bulb is just a victim of a flattened socket tab, a dirty contact, or an incompatible dimmer switch. Fixing those components is the real way to extend the life of your lighting.
Exploring various repair techniques can empower you to fix more than just bulbs, saving you time and money. ↩
Explore this link to discover effective techniques for cleaning oxidation, ensuring optimal performance of your electrical components. ↩
Learn why maintaining shiny contacts is crucial for electrical efficiency and reliability in your devices. ↩
Understanding Series circuits is crucial for grasping how many electrical devices function, especially in home lighting. ↩
Exploring Parallel circuits can reveal their benefits in maintaining functionality even when one component fails. ↩
Understanding MOVs can help you protect your electronics from power surges effectively. ↩
Exploring whole-home surge protectors can safeguard your entire home from damaging power surges. ↩