The lamp lights. Its wattage is correct. The color matches. The driver passes the electrical test.
Then an installer screws the bulb into a chandelier and the glass envelope turns while the metal base stays in the socket.
This is not a cosmetic complaint. It is a mechanical reliability failure that can become an electrical and safety problem. Relative rotation can twist internal lead wires, damage insulation, open a connection or leave the metal cap trapped in the lampholder after the glass separates.
The uncomfortable insight is simple:
A finished LED filament bulb is not only an optical and electronic product. It is also a bonded mechanical assembly.
The glass-to-base joint has to survive production, curing, carton transport, warehouse temperature, installation torque and thousands of heating and cooling events. A short lighting test proves almost none of that.
For importers and lighting brands, this failure is particularly expensive. It may remain invisible in approval samples, arrive as a scattered field complaint and be blamed on rough installers. In reality, the root cause can be a weak combination of neck geometry, cement fill, material storage, curing conditions and process control.
This guide explains how the joint fails, which factory checks are meaningful and which five decisions should be written into a bulk-order specification.
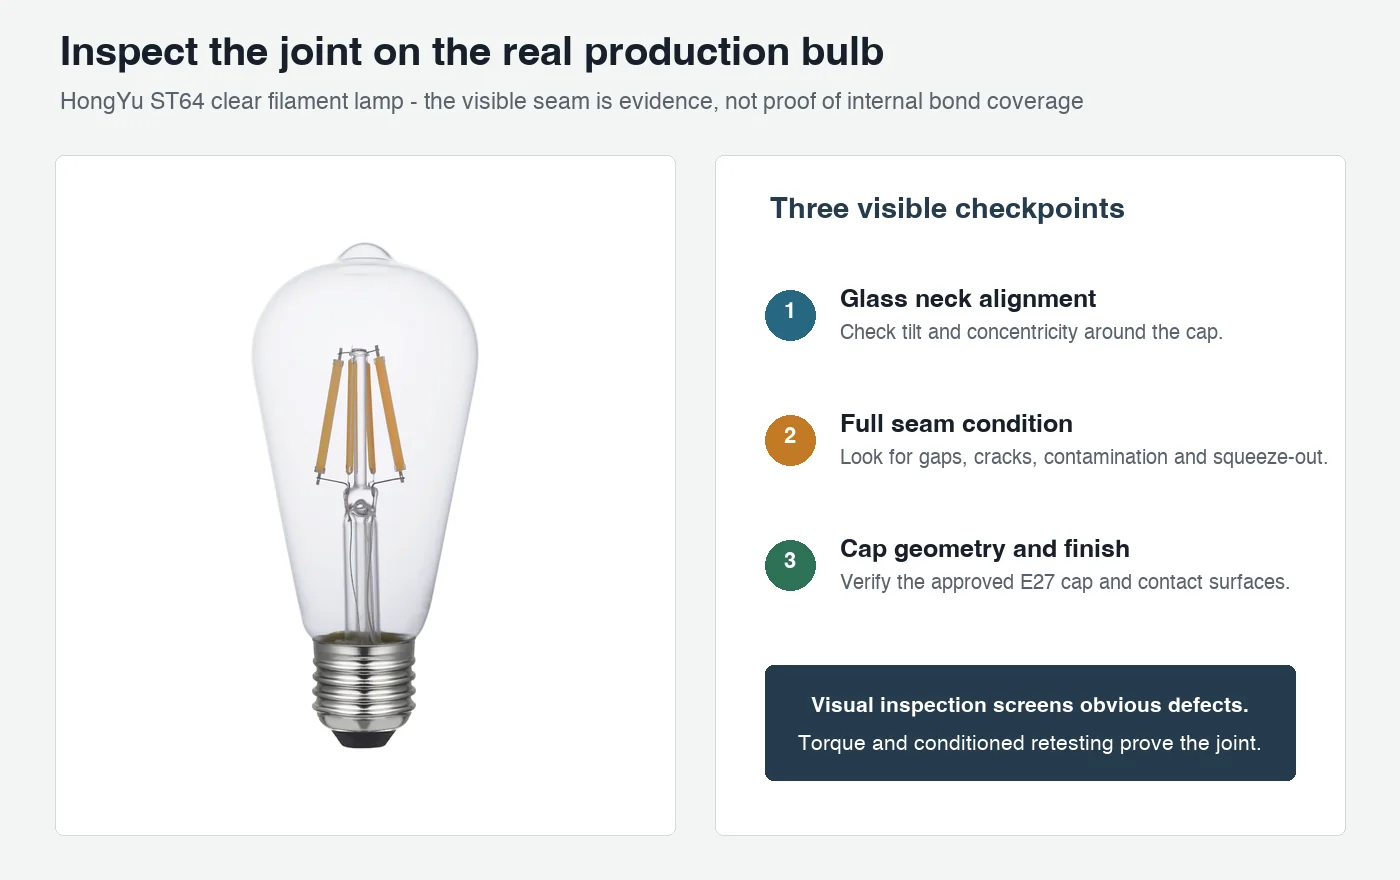
The photo above is a real HongYu ST64 product image. It shows what incoming or final inspection can actually see: neck alignment, the external seam and the cap. It cannot reveal complete internal bond coverage. That distinction matters because a clean-looking circumference can still hide an underfilled or poorly cured zone.
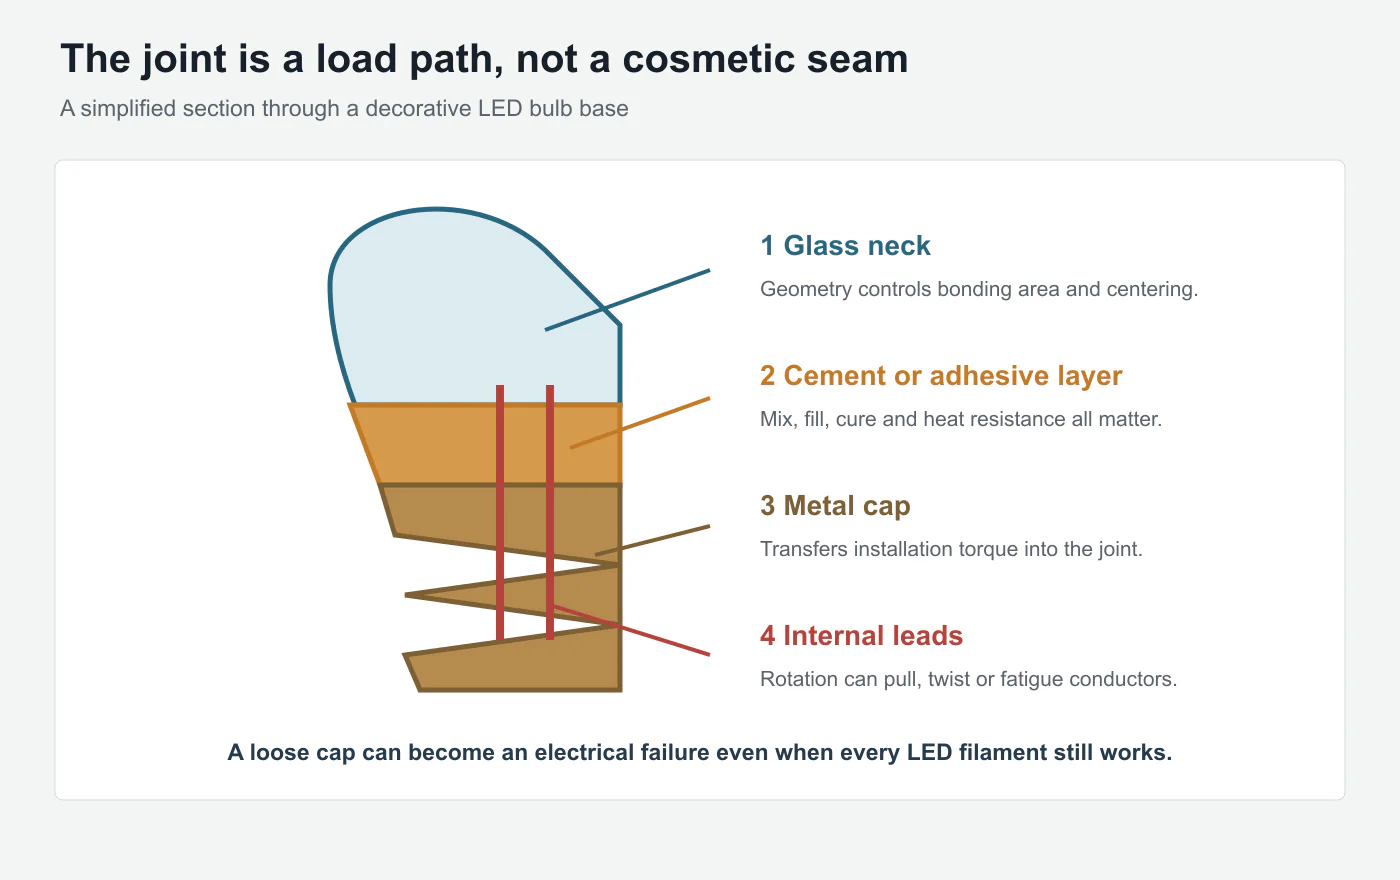
The Base Joint Is a Load Path, Not a Decorative Seam
In a typical clear decorative lamp, such as the models in HongYu's EU standard filament bulb range, the glass neck enters a metal E26, E27, B22 or other cap. A cement or adhesive system fills the interface and locks the two parts together after curing. Internal conductors pass through the same constrained area to connect the driver and light engine.
When an installer grips the glass and turns the lamp, torque travels through four elements:
- the glass envelope and neck;
- the bonded cement or adhesive layer;
- the metal cap;
- the socket threads or pins.
The weakest interface controls the outcome.
If the bond is sound, the complete lamp turns as one assembly. If the bond contains an unfilled zone, was under-cured, softened at temperature or never adhered correctly to one surface, the glass can rotate relative to the cap.
That rotation matters even if it is small. The wires inside the base are not designed to act as a torsion spring. A lamp may continue to light after the first movement, then flicker or fail after repeated installation, removal or thermal cycling.
IEC 62560 covers safety, interchangeability, test methods and compliance conditions for self-ballasted LED lamps within its stated scope.[1] The important purchasing lesson is not to copy a torque value from a different lamp. It is to identify the applicable standard, cap type and construction, then make the required mechanical tests part of the actual model approval.
Concrete judgment 1
If the glass and cap show any relative movement during the agreed torque check, treat the sample as a reject, not as a cosmetic concession.
Do not accept “the lamp still works” as the pass criterion.
Why a Bulb Can Pass Final Electrical Test and Still Be Defective
Most production lines energize finished lamps near the end of assembly. That check can reveal no-light failures, gross wattage errors, incorrect CCT, obvious flicker and some wiring defects.
It cannot directly measure bond coverage or cure quality.
A weak joint may look centered and clean. It may support the bulb's own weight. It may survive minutes or hours on an aging rack. The defect appears only when another stress is added later.
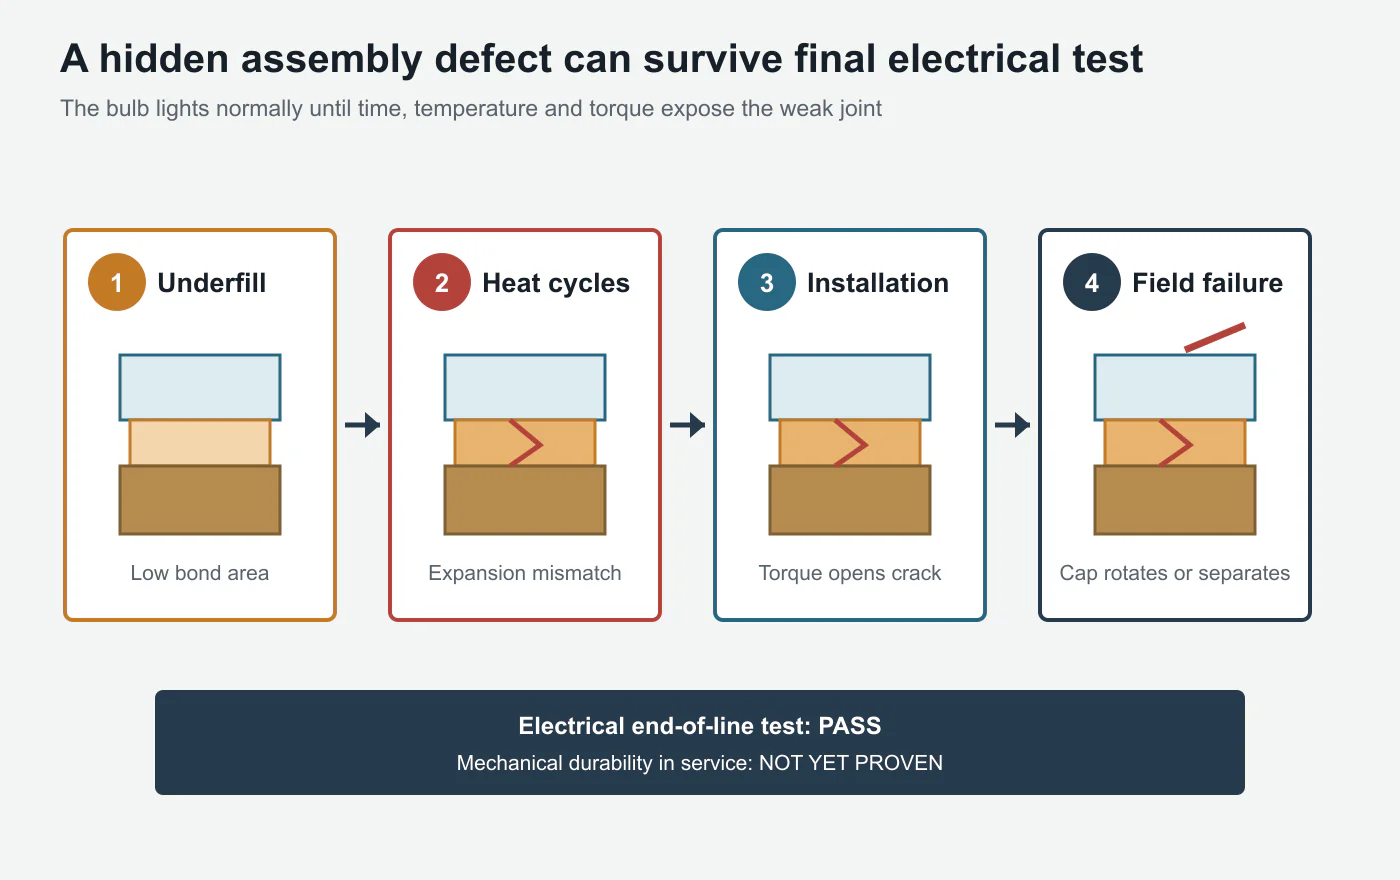
Common hidden conditions include:
- Incomplete fill: adhesive touches only part of the circumference, concentrating stress in a small area.
- Wrong mix or viscosity: the material flows away, traps voids or does not wet the glass and metal correctly.
- Contaminated surfaces: oil, release agent, dust or moisture weakens adhesion.
- Insufficient cure: the outside feels firm while the deeper bond has not reached the intended condition.
- Excessive material: squeeze-out contaminates the cap, creates poor appearance or interferes with assembly.
- Poor centering: uneven bond thickness makes one side carry more of the installation load.
- Material aging: expired or badly stored cement behaves differently from the approved production material.
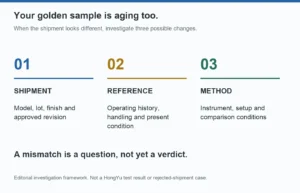
This is why a golden sample can be electrically perfect and mechanically unrepresentative of the shipment.
The U.S. Department of Energy notes that complete LED product reliability includes more than lumen depreciation; catastrophic failures can occur before the LEDs themselves reach end of life.[2] A detached base is an unusually clear example: the light source can remain functional while the product is already unacceptable.
Concrete judgment 2
A final lighting test is necessary, but it cannot release the glass-to-base joint. Mechanical inspection and testing need their own recorded result.
Heat Cycling Can Be More Revealing Than Continuous Aging
Glass, metal and bonding material do not expand by the same amount when heated. Each time the lamp warms during operation and cools after switch-off, the joint experiences strain.
Continuous operation can be less revealing than repeated on/off service because the lamp reaches a relatively stable temperature. Cycling repeatedly moves the assembly between states.
Research summarized by the Illuminating Engineering Society explains that operating environment and on/off pattern can introduce thermal stress at interconnects and that life testing should represent the intended application.[3] DOE research likewise reports that on/off cycling can produce strain and breakage through thermal expansion, with some LED products failing catastrophically before L70.[4]
Those sources discuss LED systems broadly, not this exact cement joint. The engineering inference is direct: a bonded interface between dissimilar materials should not be approved only in its new, room-temperature condition.
For factory validation, the useful sequence is:
- inspect and test the new finished lamp;
- operate or cycle it under a defined condition;
- allow it to cool to the specified state;
- inspect for cracks, tilt, gaps or movement;
- repeat the same mechanical test;
- compare the before-and-after results by model and batch.
DOE's Hammer Test work shows why combined stresses are useful for finding system weaknesses: temperature shock, humidity and heat exposed failures in boards, components and solder interconnects that ordinary lumen-maintenance thinking would not capture.[5]
Concrete judgment 3
Do not accept a torque result taken only before thermal conditioning. Require a defined post-cycle retest for a new structure, material or supplier.
The exact cycle profile should come from the applicable market requirements and the intended use condition, not from an invented universal number.
Four Field Stresses Need Four Different Questions
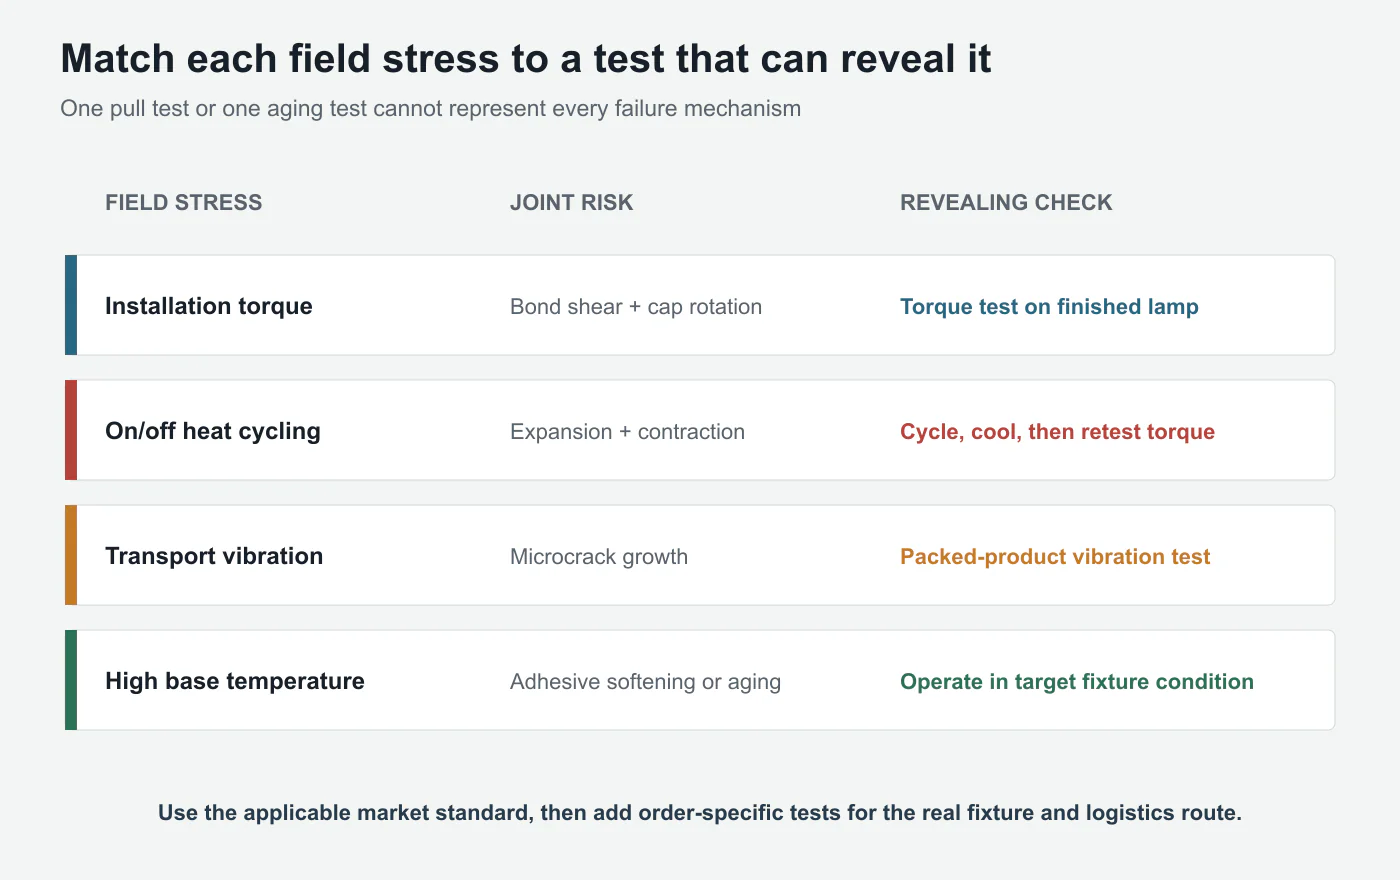
1. Installation torque
This asks whether the bonded assembly transfers twisting force without relative movement, cracking or electrical damage.
Test the finished lamp with the correct holder or fixture, agreed gripping method and applicable standard. A result obtained by holding the metal cap directly may bypass the very joint being evaluated.
2. Heating and cooling
This asks whether repeated differential expansion weakens the interface.
The condition should represent the actual lamp design and intended fixture. A low-power open chandelier and a higher-temperature enclosed shade do not impose the same joint temperature. HongYu's EU vintage straight-filament bulb range includes several decorative shapes and wattages, which is exactly why the approved joint condition must remain model-specific rather than being copied across a family.
3. Transport vibration and impact
This asks whether an existing weak zone grows during the logistics route.
Packaging prevents glass breakage, but it also controls how shock and vibration enter the lamp. A bulb packed loosely can oscillate inside its cavity and repeatedly load the base. Packaging tests therefore should use the sellable pack, master carton and intended quantity, not a bare lamp.
Concrete judgment 4
A bare-lamp vibration result cannot approve the logistics system. Test the finished retail pack and master carton used for the order.
4. Long-term material stability
This asks whether the approved adhesive or cement keeps its properties after heat, storage and production variation.
The answer depends on material identity, batch, shelf life, storage, mixing, application volume and cure. A supplier statement such as “high-temperature glue” is not a controlled specification.
Concrete judgment 5
Any unapproved change to the glass neck, cap finish, bonding material, dosage or cure method should trigger joint revalidation.
Five Factory Decisions That Prevent Loose Bases
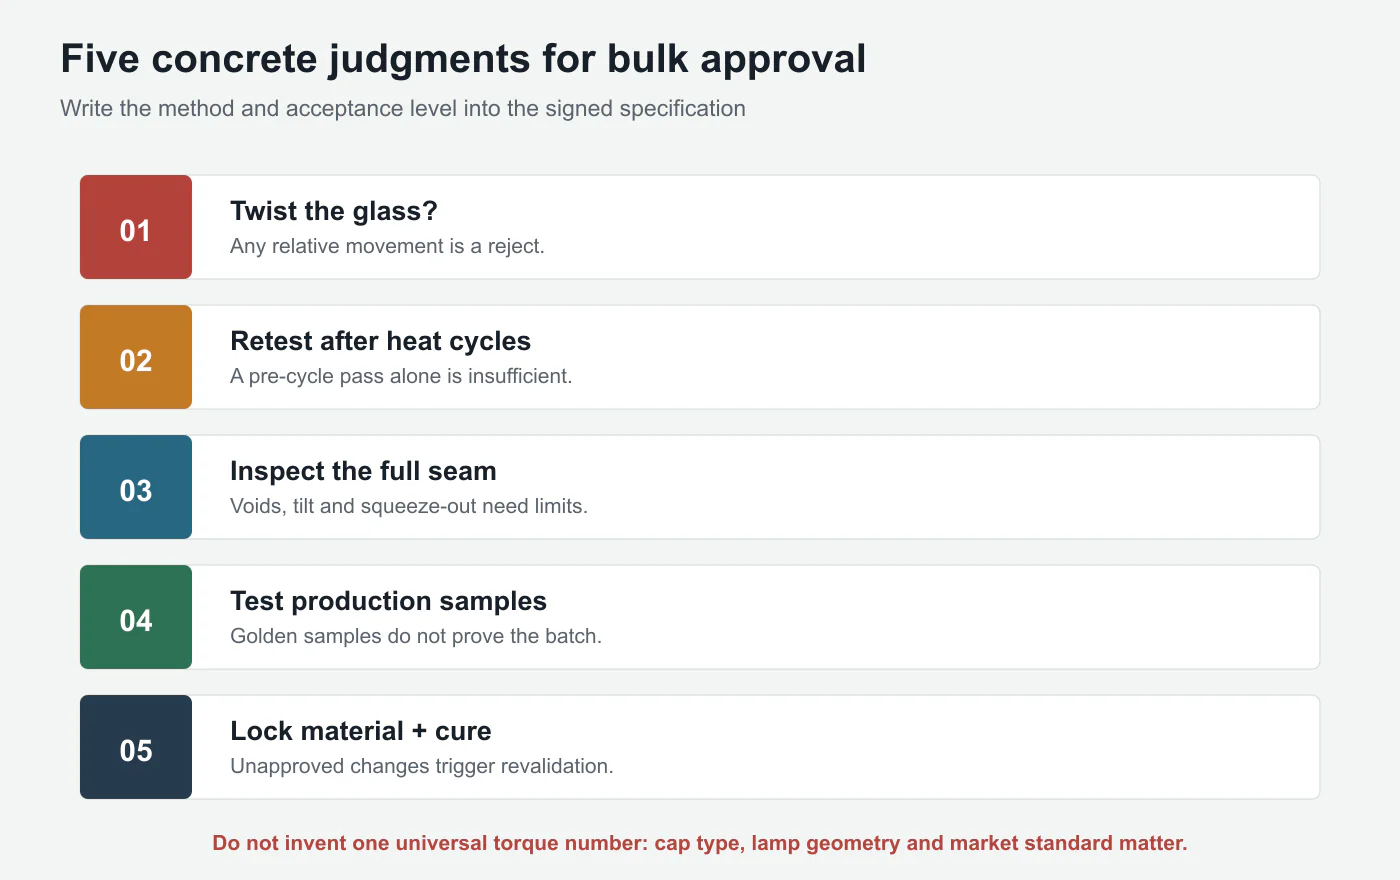
1. Define movement as a failure
The acceptance language should state that there is no relative rotation or axial separation between the envelope and cap after the specified test. Add electrical continuity and visual damage checks, but do not use them as substitutes.
2. Inspect the complete circumference
Create visual limits for tilt, exposed gaps, cracked cement, excessive squeeze-out and contamination. The outside seam cannot prove internal fill coverage, so destructive section checks are useful during engineering approval or periodic audits.
3. Validate after conditioning
Repeat the joint test after the agreed operating, cycling or environmental condition. Record whether the sample was hot, stabilized or cooled, because test state changes the result.
4. Sample from real production
Do not let the engineering room build every test unit. Pull lamps across filling heads, shifts and production time. A process defect is often intermittent; a hand-selected sample can hide it.
5. Lock the process, not only the drawing
The bill of materials should identify the approved bonding material. Work instructions should control preparation, dispensing, centering, cure time and cure conditions. A change in glass neck, cap finish, adhesive, dosage or curing method should trigger mechanical revalidation.
These controls belong in the supplier evaluation process. When visiting or auditing a factory, ask to see traceable records rather than a demonstration on one specially prepared bulb. The risk deserves particular attention in HongYu's big decorative bulb range, because a larger glass envelope creates more handling leverage above the bonded base than a compact lamp.
A Practical Approval Plan for Importers
The following plan is deliberately model-specific. It avoids pretending that one test number fits every lamp shape and cap.
| Stage | What to control | Evidence to retain |
|---|---|---|
| Design review | Glass neck, cap, bonding material, wire clearance | Drawing revision and BOM |
| Trial assembly | Fill pattern, centering, cure method | Work instruction and section photos |
| Initial test | Applicable torque, movement, continuity, appearance | Test method, equipment and raw result |
| Conditioned test | Operating or thermal cycles, then repeat test | Cycle profile and before/after comparison |
| Pack verification | Sellable packaging and transport condition | Pack specification and test report |
| Pilot production | Samples across heads, shifts and time | Sampling record and defect rate |
| Mass production | Material lot, dispensing and cure control | Batch traveler and QC release |
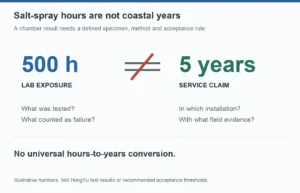
Hours alone are not the right language for this problem. A lamp with excellent lumen maintenance is still a failed product if the base separates during installation.
What a Useful Complaint Investigation Looks Like
When a customer reports a loose base, replacing the bulb is not the investigation. The failed sample can reveal whether the issue is isolated, process-related or application-driven.
Collect:
- lamp model, batch and production date;
- cap and glass-neck revisions;
- photos of the full seam before handling;
- whether the cap remained in the socket;
- fixture orientation and enclosure condition;
- operating hours and switching pattern;
- evidence of overheating, adhesive cracking or contamination;
- comparison results from retained batch samples;
- bonding-material lot and cure records.
Do not force the sample back together before documenting it. Rotation direction, wire condition and fracture surface can help distinguish adhesive separation from glass damage or cap deformation.
In factory troubleshooting, the most efficient sequence is to reproduce the complaint on retained production samples, verify the process records, then isolate one variable at a time. Changing adhesive, fill amount and cure simultaneously may stop the symptom, but it destroys the evidence needed to control the next order.
The Manufacturer's View: The Cheapest Joint Is Not the Lowest-Cost Joint
Base cement is physically small and commercially easy to ignore. Yet a small saving in material, cure time or inspection can create one of the most visible product failures possible: the customer holds the glass while the metal cap remains in the fixture.
The direct replacement cost is only part of the loss. The importer may face installation labor, damaged lampholders, retailer returns, safety review and loss of confidence across an entire decorative range.
The correct cost target is therefore not the lowest bonding-material price. It is a stable process that produces enough mechanical margin after aging, transport and installation.
That margin cannot be confirmed by appearance alone. It comes from a controlled material, repeatable geometry, complete cure, representative sampling and a test sequence connected to real field stress.
Conclusion
A loose LED bulb base is not an unlucky cosmetic defect. It is evidence that the product's mechanical system was under-specified, under-controlled or tested under the wrong conditions.
The key purchasing insight is to stop treating the glass-to-cap seam as finishing work. It carries installation torque, protects internal conductors and must remain stable while glass, metal and bonding material repeatedly heat and cool at different rates.
Approve the joint as a system. Define relative movement as failure. Inspect the full seam. Retest after conditioning. Sample real production. Lock the bonding material and cure process.
The LEDs may still work, but if the base separates, the bulb has already failed.
References
- IEC 62560:2011+A1:2015, Self-ballasted LED-lamps for general lighting services - Safety specifications. ↩
- U.S. Department of Energy, LED Basics. ↩
- Illuminating Engineering Society, Testing: Two Techniques. ↩
- U.S. Department of Energy, 2019 Solid-State Lighting R&D Opportunities. ↩
- U.S. Department of Energy, Hammer Testing Findings for Solid-State Lighting Luminaires. ↩